
 In one of my previous post, I promised that I would post step by step instructions on how to do this grey o
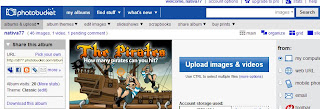
 ut technique. First you have to join Photobucket. After that has been done, you can start to upload your pictures.
After you have uploaded your pictures, edit the one that you want to work on. You will be taken to another screen with a numbe
 r of image touch up options.
Click on the Effects tab and then on the Greyscale icon. As soon as you click on this icon, the entire image would be changed to a black and white image. Click on the Advance options button and a little box will be displayed with the options to grey out the entire image, focal area (this is also a cool technique but I have not really experimented with it as yet) or painted region. Choose Painted Region.

There will be a feature for a brush size, choose the size that you feel comfortable and begin to maneavour your mouse to control your 'paint brush' to color the areas that you want to grey out.
I choose a larger brush size to grey out the larger areas that need greying out. I use a smaller size brush to grey the areas that are closest to the area that I want to stay in full color.

There is also an option where you can zoom in on the image so you can see the areas closer up that need to grey out.
After you have completed the entire picture (the areas that you want grey out that is), you can either save a copy or replace the original picture with one you have just greyed out.
The next step is to right click on the image and select the 'save taget as' option to save the file to your computer. That's it!
I wish you much sucess!!!!


No comments:
Post a Comment
Thanks soooo much for commenting on my content . I makes me super happy!!!